Okay folks, I'm not going to lie to you. So far, 2011 kinda sucks. Dealing with car issues and money issues, warring with my propane company - well, let's face it! That's a whole lotta stress to deal with in just a few short weeks. Still, it's only stress right? And it's pretty much over, so what am I still bitching about? The fact is, after 2010 (which was an AMAZING year by the way), 2011 seems like kind of a let down. Then again, that seems to be par for the course. EVERY YEAR I have an obscenely crappy first couple of months - only to have the rest of the year go off without a hitch. Well, I'm crossing my fingers and toes that this tradition still stands because I really loved having such a kick ass (most of the) year - last year.
Things I accomplished in 2010:
1. Got a job - not a wow, amazing job with amazing pay and amazing benefits kind of job, but still one that I enjoy (and that's really all that matters) and brings in more than a piddling 80 dollars per week of pay!
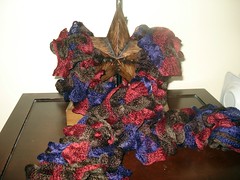
2. Conquered lace - I knit my first REAL lace shawl last year - and not only that but I knit it with beads. The
Swallowtail Shawl by Evelyn A. Clark. Thanks to this shawl, I'm no longer suffering from fear of intricate lace knitting and am even now working on my second lace shawl (after this shawl was finished I fell into kind of a sock knitting rut where I went on a bender and knit sock after sock after sock- seriously, I don't know what happened!)
3. I conquered (with great success mind you) the thing that I formerly referred to as Baguettes of Extreme Hatred. That's right, I successfully baked beautiful, delicious, crunchy on the outside soft on the inside French Baguettes.
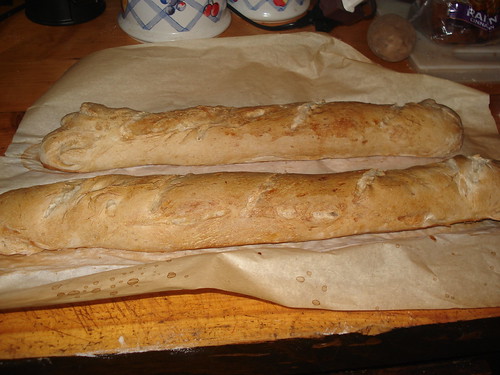 See? Visual proof! Not the prettiest of breads, but they were outstandingly tasty! And not burnt at ALL! WOOOOT!
 Now, I'm sure I accomplished a few more things than just three - but I felt these were three personal mile stones worthy of note. :D
Things I plan on accomplishing in 2011:
1. Hop back on the blog bandwagon and try very hard to blog more consistently - at least twice per month. I know I failed at this last year, and honestly I have no excuse except that
Plurk and
Ravelry seem to have kind of killed the purpose behind this blog. Well, no more. While I will still be sharing on both those sites, I will also be sharing here, in hopes of attracting the readership that I once had. :D I may even be holding contests and giveaways - provided I can think of adequate excuses to host such things. :D
2. Become a more versatile knitter - I plan on experimenting with colorwork (which I've already started as you will see following this little blurb), magic loop, two circs, toe-up socks - new techniques that I previously shied away from. I've been at this for a while now and I think it's time I upped the ante!
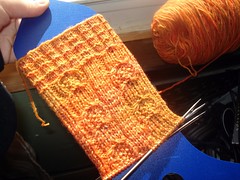
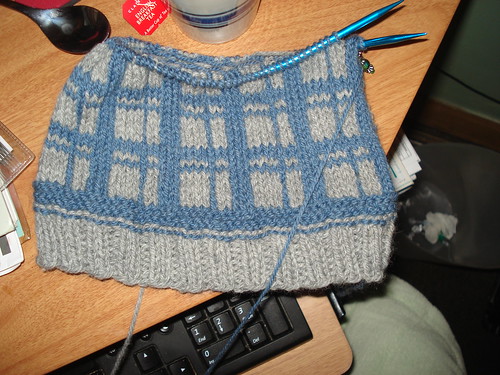 See the pretty plaid pattern? I know it's not intricate colorwork- but it IS colorwork and the hat itself came out amazingly gorgeous. My brother LOVED it - and is apparently anxiously awaiting a matching pair of mitts - which I apparently need to design.Once I can catch my elusive lil' bro and the hat in action I'll snap a pic and post it here so you can see the finished project.
 3. Have a baby of my own to spoil with hand knits - that's right. Me and DW have thought about it and we're planning to hopefully be pregnant by September (this way I can avoid being pregnant during hot summer months :D). Naturally we have to do things via a cryobank so if anyone knows of any good information out there about this sort of stuff I'd be grateful if you could point me in that direction.
4. Lose about 15 lbs (I'd like to lose more - but the 15 lbs is a good, pressureless goal and I need to not feel pressure. Pressure = failure for me. ). :D
These are not actual resolutions, as I think that resolutions (since I've failed them so often in the past) seem to fall pretty much useless to me. So instead, I'm considering this more of a To Do list. That way it seems more like these are things that MUST GET DONE as opposed to things that Could Possibly Be Done. :D
To kick 2011 off, I cast on for some intricate - previously feared lace. Yes, I did knit lace in 2010 and successfully too, but as opposed to the 6 different charts this shawl utilizes, the Swallowtail only utilized two. So, this should help me branch out into more complicated lace. :D
 The Echo Flower Shawl - in it's first stages. That's the set up chart and the first of 13 (maybe more depending on how it looks after 13 - I don't want to end up with yet another neckerchief sized shawlette) repeats of the Flower chart. :D So far, so good. And no, I will NOT be using beads in lieu of knitting the nupps. I don't care how torturous it is to purl those little buggers, I WILL do it. 9 stitch nupps will be my servants by the time I'm done with them. And that's a fact!
 I've also semi-designed a pattern for a pair of men's socks for DW's captain's very large man feet. He's a size 11, and while that might not seem huge to most of you, I'm used to knitting for my tiny size 6 feet, DW's normal size 8 1/2 feet and my mum and aunt's equally tiny size 7 feet. Knitting for size 11's - well it's intimidating. Especially since every single pattern designed specifically for a big guy's clown feet seems to be like two miles long, involves calf shaping, and just generally seems to be too much work for something I wanted to be TV knitting. So, I used
this pattern as kind of a guide to do some guess work and with the help of some of my very awesome Plurk friends used guage *gasp* to do the rest. I've been knitting so many socks lately that I pretty much know the basic anatomy of a sock and well, the rest was just kinda eyeballing it.
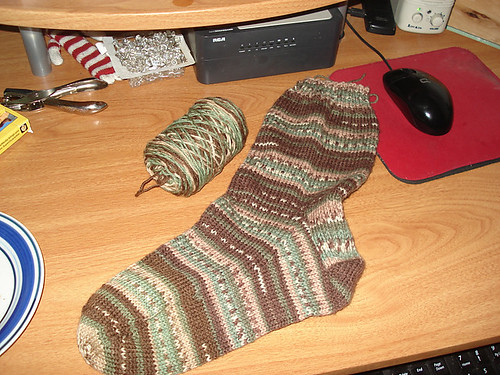
That's the first of the Giant Socks of Doom, and well, I don't think it came out all that shabby. I only hope it fits. I mean, we all remember what happened that last time I bothered with a guage swatch, right? (Shall I remind you of the
Great Talia Desaster of '08 ? ) But really that's all I've done knit-wise for 2011. I do plan on relearning crochet though. There are way too many adorable amigurumi dolls and such wanting to decorate my bookshelves. Seriously. Way too many to even name. I mean, oh my gosh, look at the
cuteness!
Cooking wise, I haven't done much either. Well, nothing out of the ordinary until my dinner last night. It was just steak and the most amazing side dish ever! It was so light, but so filling. It was just perfect. And yes, I WILL be sharing that recipe with you all, here and now. :D So without further adieu, I give you:
Whipped Cauliflower!
I've roasted it with great results, steamed it with just a little bit of butter, had it pickled, eaten it blanched and dunked in the most delicious of creamy sour cream based dips, but this was the first time that me and whipped cauliflower have met with success.
My obsession with figuring out this recipe started a few years ago when it first graced my palate via a local restaurant that I can't even remember the name of. But oh this cauliflower was perfect. It was creamy! It was delicately nutty in flavor, with just the perfect hint of garlic and still had those pleasing little lumps of tastiness that I've come to love in home made mashed potatoes. My first attempts only yielded a watery, chunky, oily puree of grey disgust with little to no flavor and I gave up. But suddenly,yesterday, I was struck with total inspiration and realized that while my basics were indeed all there, I had forgotten one important thing. A thickening agent - which I discovered in corn starch blended with a bit of heated milk.
All right all right, I'll get to the recipe as I'm sure you're all slavering to get at it. Let me just tell you that I was not always a cauliflower lover, and it wasn't until I tried this dish that I became a true cauliflower devotee. I'm hoping this will convert you all to this new epicurean religion as well, or at least have you wanting to lick the bowl of your food processor afterwards as I nearly did. :D
Whipped Cauliflower 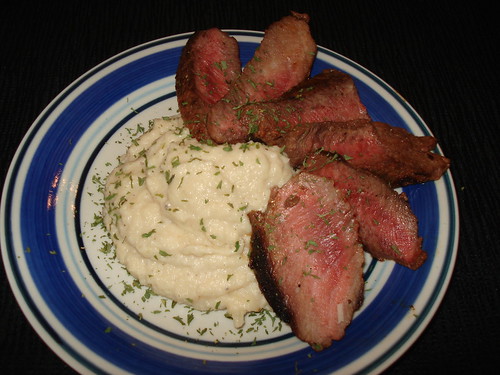
What You Need:
A small head of fresh cauliflower
3-5 cloves of garlic
1 tbsp milk
1 tsp to 1 1/2 tsp corn starch
3 small shallots
olive oil
1/4 cup of freshly shredded parmesan
1/2 cup of fat free sour cream
2 tbsp unsalted butter - do not substitute for margarine. It WILL turn oily and icky.
salt and pepper to taste
* A steamer basket *
Step 1: Trim the cauliflower into florets and peal the garlic cloves. Insert steamer basket into large pot (or smallest pot that you can fit it into and still have it completely open) that has about 2 cups of water poured into the bottom of it. Put the cauliflower florets and garlic cloves into the steamer basket, turn your burner onto medium-high heat and cover the pot and let steam until the cauliflower and garlic is tender (by tender I mean you can insert the tines of a blunt fork - such as a plastic one - into the toughest part of the floret with ease. You want it softer than you would if you were just steaming it to eat it with butter or cheese, but you don't want it to fall to mush either.). About 15 minutes seemed to do the trick for me once the water got boiling.
Step 2: Peel and trim the shallots, cutting them in half and give them a toss in a little bit of olive oil and then sort of pan roast them until they show signs of softening and a bit of translucency. Set aside.
Step 3: Remove cauliflower and garlic from your steamer basket and put in the bowl of your food processor. Add the shallots and put the lid on the bowl and pulse a few times to get an even, almost granular consistency. The cauliflower will not totally puree, but that's all right. It will. :D
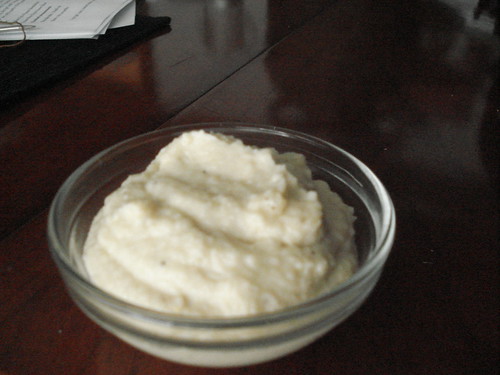
Step 4: Heat the milk up in the microwave for about a minute, and dissolve the cornstarch in the heated milk. While continuing to pulse the cauliflower mix, slowly add the milk/starch mixture. Stop pulsing and just allow the food processor to run (if you have multiple speeds, use medium speed). It will turn thick and somewhat pasty. Add in the butter, sour cream, parmesan and salt and pepper, blend until it holds a reasonably even and smooth consistency. It should look something like this:
Step 5: Serve hot with a small pat of butter (or at this point margarine) on top, some freshly snipped chives or parsley, or even with additional sour cream and cheese as you would loaded mashed potatoes and enjoy!
Also in case you're curious, the steak that accompanied this side was a London broil cut that I trimmed all tough connective tissue from, rubbed with a mixture of dry mustard, smoked paprika, garlic and onion powders and sea salt after it came to room temperature, then rubbed with softened butter on both sides and put into a pre-heated skillet for a nice sear. Mine was about 1 " thick so I did it about 3 minutes on each side and then just let it sit in the skillet for a few minutes to cook to medium rare. I basically adapted
this recipe to suit my needs and it came out fantastic! I will probably never cook steak a different way again. Yes the butter was kinda fattening, but unfortunately butter seems to be the only adequate browning agent for meat without having to use tons of it (I used about 1 tbsp for each side of the steak). And then for serving I did as advised in the recipe and sliced it on the diagonal going across the grain of the meat.
*By steamer basket I do not mean that little insert thing that sometimes comes with your pan sets. I mean something like
this. I find it provides a faster, more even steam than those little inserts. And microwave steaming, well, it really just turns the veggies to rubber right? I bought mine at Wal Mart for like five dollars, but I'm sure if you want to you can spend more money for a fancier one that does the same thing. Just goes to show you that sometimes the more money you spend (i spent like twenty dollars on that little insert thingie) does not always equal better. :D *